

 12694 Reads
 16 mins


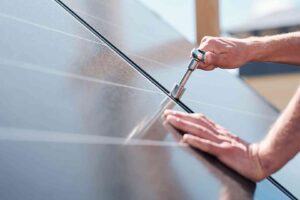
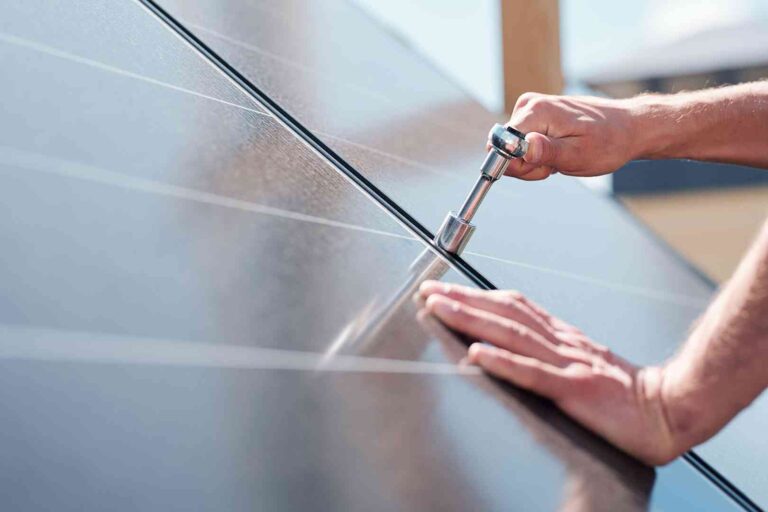
Installing rooftop solar involves much more than fixing panels on a roof.
- The PV (photovoltaic) system must be correctly sized.
- The roof and shading need professional assessment.
- The right equipment must be selected, and the installation must meet electrical and safety requirements.
As a homeowner, you are not expected to perform these technical assessments yourself. Your job is to make sure a qualified solar installer completes them and explains the findings before you approve the system.
This solar installation checklist covers what to verify before selecting your rooftop solar system, before installation begins, during installation, and before accepting the completed rooftop solar plant.
Solar Installation Checklist at a Glance
A complete rooftop solar installation checklist should cover the entire project, from electricity consumption and roof assessment to commissioning, monitoring, and handover. Checking only the panels or total installation price can leave important design, safety, and service requirements overlooked.
Here’s a snapshot of the rooftop solar installation checklist that every homeowner must follow:
| Stage | What You Should Check |
| Before planning |
|
| Before selecting an installer | Check the installer’s eligibility, experience, system design, exact equipment, complete quotation, warranties, and after-sales support. |
| Before installation | Confirm the approved panel layout, inverter location, cable route, and applicable subsidy or DISCOM approvals. |
| During installation | Verify that the approved panels, inverter and mounting structure are being used, and that roof work, cable routing, earthing, and electrical protection are completed properly. |
| Before handover | Confirm system testing and commissioning, monitoring access, applicable metering or grid connection, warranties, invoices, and all final handover documents. |
Let us look at every stage in detail.
What Should Be Assessed Before Planning a Rooftop Solar Installation?
Before deciding the system capacity or comparing quotations, your electricity use, connection details, and rooftop need to be assessed. While some information can be collected from your electricity bill, roof measurements, shading, and the final panel layout should be assessed by a rooftop solar installer.
Here’s a step-by-step overview of the process –
1. Review Your Electricity Consumption
Your electricity consumption is one of the first inputs used to determine the suitable solar system capacity. Steps to check that –
Step 1. Review the electricity units consumed over the previous 6 to 12 months rather than looking only at the bill amount.
Step 2. Account for seasonal changes and any major loads you expect to add later, such as another air conditioner or an electric vehicle.
The objective is to design the plant around realistic annual electricity requirements rather than simply installing as many panels as the roof can accommodate.
2. Check Your Sanctioned Load and Electricity Connection
Your electricity bill contains information such as the sanctioned load and consumer connection details. Share these with the installer before the system is designed.
The installer should assess how the proposed solar capacity fits with your existing electrical connection and the applicable requirements of your DISCOM (distribution company).
Requirements can vary between states and distribution companies. So, this should be checked for your specific connection.
3. Get Your Roof Condition and Structural Suitability Assessed
A qualified installer should assess whether the roof is suitable for the proposed rooftop solar system before installation begins.
The assessment should identify issues such as:
- Cracks or visible structural damage
- Existing water leakage
- Weak or aging roof sections
- Waterproofing problems
- Roof areas that may require repair
- The type of roof and suitable mounting method
Any important roof repair should ideally be completed before the mounting structure is installed.
4. Get the Usable Shadow-free Roof Area and Panel Layout Assessed
The total size of your terrace differs from the area that can actually be used to install solar panels. Keep in mind that every 1 kW of rooftop solar needs at least 100 square feet of shadow-free area for installation.
During the site survey, the installer should account for:
- Shadows from nearby buildings, trees, water tanks, staircase rooms, parapet walls, antennas, and other roof obstructions
- Changes in shading by the hour and across seasons
- Space required between panel rows
- Safe access for cleaning and maintenance
- Suitable panel orientation and tilt
In India, south-facing panels generally receive favorable solar exposure. However, east- or west-facing layouts may also be considered depending on the roof conditions. The installer should use the shading assessment and available roof area to create a site-specific panel layout instead of applying the same design to every home.
SolarSquare’s installation process, for example, includes a detailed site survey, software-based shadow assessment, and system layout design rather than relying only on how sunny the roof appears during a single visit.
Checklist to Follow Before Choosing a Solar Installer
A solar installer should be evaluated on project execution, equipment quality, engineering capability, service support, and the complete scope of work. Comparing quotations solely on the lowest price per kW can mask differences in components, structure, warranties, and after-sales service.
Here’s a simple checklist that you can follow to land a reputable installer –
1. Verify the Installer’s Eligibility and Track Record
For a subsidy-linked installation, confirm that the installer meets the applicable PM Surya Ghar Muft Bijli Yojana and DISCOM requirements.
You should also assess the company’s experience with residential rooftop installations, service presence, and after-sales support.
Ask who will take responsibility if the rooftop solar system develops an inverter fault, generation problem, roof-related issue, or electrical problem after installation. Look for genuine Google reviews and pay close attention to how the company responds to past customers.
2. Compare the Complete Project Scope
Ask for a quotation that clearly identifies what is included in the proposed system.
It should provide clarity on items such as:
- Solar system capacity
- Panel technology and model
- Inverter model and capacity
- Mounting structure
- DC and AC cables
- Electrical protection
- Earthing
- Installation work
- Monitoring
- Metering and DISCOM-related scope
- After-sales service
Two systems with the same stated kW capacity can differ substantially in equipment, engineering, and service quality.
3. Check Warranties and After-Sales Support
Solar panels are designed to operate for decades, while other system components may require service or replacement earlier. Check who supports each component after installation.
- Review the panel’s product and performance warranties, inverter warranty, installation or workmanship coverage, and the maintenance support included with the project.
- The warranty conditions should also be available in writing rather than only being explained verbally.
What Equipment Should Be on Your Solar Panel Installation Checklist?
A solar panel installation checklist should cover the entire system, not just the module. Panels, inverter, mounting structure, cables, connectors, earthing, and electrical protection all affect how safely and reliably the rooftop plant operates.
1. Solar Panels
Confirm the exact panel technology, wattage, manufacturer, model, and quantity specified in the quotation.
For a subsidy-linked residential system, the installer should also confirm that the modules satisfy the applicable DCR (Domestic Content Requirement) and ALMM (Approved List of Models and Manufacturers) requirements.
When the equipment reaches your home, the supplied panel model and quantity should match what you approved.
2. Solar Inverter
The best solar inverter must be selected as part of the overall system design. Ask the installer to explain why the proposed capacity and configuration are suitable for your solar array.
Also check:
- Inverter model
- Warranty
- Monitoring capability
- Installation location
- Manufacturer service support
The inverter should be installed in a suitable, protected, and ventilated location that remains accessible for monitoring and servicing.
3. Mounting Structure
The mounting structure holds the solar array on the roof and must be engineered for the building and local conditions. The installer should account for the roof type, structure material, corrosion protection, anchoring method, panel height, and wind loads applicable to the site.
4. Cables, Connectors and Electrical Protection
The installer should design the DC and AC electrical system using components suited to a solar installation.
Your quotation and final system should account for solar-grade cables and wires, suitable connectors, isolation and circuit protection, surge protection, earthing, and any required lightning protection.
Cables should also be properly secured and protected, rather than left loose or unnecessarily exposed.
Solar Installation Checklist for PM Surya Ghar Muft Bijli Yojana Subsidy and Net Metering in 2026
If you plan to claim the PM Surya Ghar Muft Bijli Yojana subsidy, complete the applicable portal and DISCOM process before installation. The system must also meet the scheme’s equipment and vendor requirements. Installing first and checking subsidy eligibility later can put the subsidy claim at risk.
1. Complete the Required PM Surya Ghar Online Registration Process Before Installation
For subsidy-linked residential installations, register and apply through the official PM Surya Ghar Muft Bijli Yojana portal and complete the applicable feasibility stage before proceeding with installation.
- After installation, plant details are submitted, and the applicable net metering and DISCOM inspection process follows before commissioning.
- The exact process can change. So, check the National Portal and your DISCOM requirements when you apply.
2. Check DCR and Current ALMM Requirements
For a subsidy-linked grid-tied PV system, ask your installer to confirm the applicable DCR (Domestic Content Requirement) and ALMM (Approved List of Models and Manufacturers) requirements before ordering the panels.
- ALMM List-I contains approved solar PV module models and manufacturers. MNRE (Ministry of New and Renewable Energy) states that modules covered by List-I are required for categories including government-assisted and net-metering projects. The current List-I was updated on August 3, 2026.
- ALMM List-II covers solar PV cells. Its applicability has been subject to several updates and clarifications during 2026. So, the latest MNRE notification relevant to the project and installation date should be checked rather than relying on an older list.
3. Check Your DISCOM and Metering Requirements
Grid-connected rooftop solar must follow the process applicable to your local DISCOM.
- Depending on the state and connection, this can include feasibility approval, submission of plant details, inspection, meter replacement, or configuration and final grid commissioning.
- Your installer should explain which steps it handles and which actions, if any, require your participation.
What Documents Should You Keep Ready Before Solar Installation?
Keeping the required documents ready can prevent avoidable delays in the subsidy, net metering approval, and commissioning process. The exact list varies by DISCOM and scheme, but homeowners commonly need electricity connection, identity, banking, and property-related information.
Keep these documents or details accessible:
- Latest electricity bill
- Identity details like Aadhaar card or voter card
- Bank details or cancelled cheque for subsidy transfer
- Roof/property details
- Approved quotation/agreement with the installer
- Solar equipment details
- DISCOM/portal documents
What Should You Check Before the Installation Team Starts Work?
Before work begins, ask the installer to walk you through the final approved design. Confirm that the panel layout, inverter location, cable route, mounting plan, and any required roof repairs match what was agreed during the site assessment. This final check helps prevent unapproved changes or on-site improvisation during installation.
What Should You Check During Solar Panel Installation?
During installation, the homeowner does not need to inspect the electrical engineering details personally. Instead, verify that the installer follows the agreed design, uses the approved equipment, and completes the mounting, waterproofing, wiring, protection, and earthing work before commissioning.
1. Mounting Structure and Roof Work
Confirm that the mounting structure being installed matches the agreed project specification.
- Pay particular attention to visible roof damage and waterproofing around any penetrations.
- The structure should also be installed cleanly without creating unnecessary obstructions across the terrace.
2. Solar Panel Installation
Verify that the delivered panel model and quantity match the quotation and that panels do not have obvious physical damage.
- Panels should be lifted, positioned, and secured by trained installers using methods compatible with the manufacturer’s instructions.
- Improper handling or installation can create cell-level damage and contribute to performance loss over time.
3. DC and AC Wiring
Cables should be properly routed, supported, and protected.
- Look for obvious workmanship issues such as hanging cables, exposed connections, or untidy routing.
- Detailed electrical connections should be inspected and tested by the installation team rather than by the homeowner.
SolarSquare’s installation process, for example, routes solar cabling through suitable protective conduits or cable management systems and uses purpose-built MC4 connectors on the DC side.
4. Earthing and Electrical Protection
Ask the installer to confirm that the required earthing and protection systems have been completed before the plant is energized.
- Depending on the system design, this can include equipment earthing, AC and DC protection, surge protection, and lightning protection.
- Proper electrical design and earthing also help reduce avoidable long-term performance problems.
5. Inverter Installation
Confirm that the installed inverter is the model specified in your quotation.
The installation team should complete the DC and AC connections, communication setup, and required electrical checks before the system is switched on.
What Should You Check Before Accepting the Completed Solar Installation?
Panel mounting does not mean the rooftop solar project is complete. Before final handover, the system should be inspected, tested, commissioned, and connected to monitoring.
You should also receive the documents and credentials needed to operate, monitor, and claim service for the system.
1. Inspect the Completed Installation
Do a visual walkthrough with the installer after the work is finished.
Check the panels, structure, roof, inverter location, electrical boxes, and visible cable routes. Ask about anything that appears damaged, incomplete, or different from the approved layout.
2. Confirm Testing and Commissioning
The installation team should complete the required electrical checks before making the plant operational.
- The process includes checking DC string output and AC-side parameters before inverter start-up.
- The inverter is then checked to confirm that the system is generating correctly.
You do not need to carry out these tests yourself. Ask the installer to confirm that commissioning has been completed and explain the system status.
3. Set Up Solar Monitoring
Before handover, make sure you can access the system’s monitoring platform.
- You should be able to see current and historical generation and identify when the inverter reports an error or stops generating.
- Monitoring is especially important because an electrical or inverter fault may not be obvious from simply looking at the panels.
4. Complete Metering and Grid Commissioning
For a rooftop on-grid solar system, confirm that the applicable DISCOM inspection, metering, and commissioning process has been completed.
- The meter arrangement tracks electricity exchanged between your home and the grid in accordance with applicable state regulations.
- Do not confuse completion of the physical installation with completion of the entire grid-connection process.
5. Collect the Final Handover Documents
Before closing the project, collect the records that may be required for future service, warranty, or regulatory purposes.
These can include:
- Final invoice
- Panel warranty documents
- Inverter warranty
- Installation or workmanship warranty
- Equipment datasheets
- Final system details
- Commissioning documents
- Monitoring login credentials
- DISCOM and metering documents
- Service contact details
Rooftop Solar Installation Checklist: Final 26-Point Checklist
Use this checklist for solar panel installation as a final review from planning through handover.
- Review 6 to 12 months of electricity consumption
- Consider major future electricity loads
- Check the sanctioned load and connection details
- Get the roof condition and structural suitability assessed
- Get the usable shadow-free roof area and panel layout assessed
- Verify the installer’s eligibility and track record
- Confirm the exact system capacity
- Confirm the panel model and quantity
- Confirm the inverter model and capacity
- Review the mounting structure specifications
- Review the included electrical protection
- Confirm the applicable warranties
- Confirm after-sales service
- Check PM Surya Ghar Muft Bijli Yojana eligibility, where applicable
- Check the current DCR and ALMM requirements
- Complete the required approvals before installation
- Confirm that the final panel layout, inverter location, cable route, mounting plan, and required roof repairs match the approved design
- Verify that the delivered equipment matches the quotation
- Inspect visible mounting and roof work
- Check visible cable routing
- Confirm that earthing and electrical protection are complete
- Confirm that the correct inverter has been installed
- Confirm system testing and commissioning
- Activate monitoring access
- Complete the applicable metering and grid-connection process
- Collect warranties, invoices, credentials, and handover documents
Common Solar Installation Mistakes to Avoid
Most avoidable rooftop solar problems begin with poor planning, unclear quotations, or weak installation practices. A good solar installation checklist helps identify these issues before they affect solar generation, safety, or the roof itself.
Avoid these common mistakes:
- Choosing system capacity only from available roof area
- Ignoring future electricity requirements
- Installing over a roof that requires repair
- Relying on a visual shade check instead of professional analysis
- Comparing installers only by pricing
- Accepting a quotation without exact panel and inverter details
- Ignoring mounting structure and electrical protection
- Installing before completing applicable subsidy approvals
- Treating panel mounting as final project completion
- Finishing the project without monitoring access or handover documents
Conclusion
A reliable rooftop solar system installation always starts with proper site assessment and ends only after testing, commissioning, and handover. As a homeowner, you do not need to perform the engineering yourself, but you should know what your installer is expected to assess, install, and verify at every stage.
SolarSquare handles the rooftop solar journey from site assessment and system design to installation, subsidy assistance, net metering, and after-sales support. You can book a free consultation with our experts to understand the right rooftop solar system for your home.
Frequently Asked Questions
What should I check in a solar installation quotation?
Check the proposed system capacity, exact panels and inverter, mounting structure, cables, protection equipment, earthing, installation scope, warranties, after-sales service, subsidy or DISCOM support, and all applicable charges. Avoid quotations that provide only a total per-kW price without component details.
What should I inspect after solar panels are installed?
Inspect the visible panels, mounting structure, roof condition, cable routing, inverter, and electrical boxes. Then, confirm that the installer has completed electrical testing, commissioning, and monitoring setup. For an on-grid PV plant, also check the applicable DISCOM metering and grid-connection status.
How can I check whether solar panels are ALMM approved?
Use the latest MNRE ALMM List-I and search for the exact solar PV module manufacturer and model proposed for your system. Do not check only the company name because ALMM approval is linked to listed module models. The list is updated periodically. For solar cells, check the ALMM List-II.
What safety features should a rooftop solar installation have?
Although the exact required safety design depends on the system, residential rooftop solar commonly includes proper equipment earthing, circuit isolation, AC and DC protection, surge protection, lightning protection, and suitable cable protection.


 Previous Article
 15 min


![10 kW Solar Panel Price in India [With and Without a Subsidy]](https://cdn.solarsquare.in/blog/wp-content/uploads/2025/07/18165650/10-KW-solar-panel-300x167.webp)