
 17 Reads
 12 mins


Somewhere between “I should really get solar panels” and actually having them on your roof, most people give up. Not because solar is a bad idea; the math almost always works in your favour, but because nobody explains the process in the order it actually happens. What paperwork comes first. What a DISCOM inspection even is. Why some installers can get you a government subsidy and others can’t.
That’s what this guide is for. No jargon dumps, just a clear, step-by-step walkthrough of how home solar installation actually works in India, what it costs, and what tends to go wrong when people skip a step. By the end, you’ll know exactly what to ask any solar power company before you sign a contract.
Why Solar Panels for Home Make Financial Sense in 2026
Before getting into the “how,” it’s worth understanding why so many Indian households are making this switch right now. Two forces are pulling in the same direction: electricity is getting more expensive, and solar equipment is getting cheaper; that combination is what’s driving the current wave of adoption.
- Electricity tariffs in most Indian states sit between ₹6-8 per unit and climb well above ₹12/unit in states like Maharashtra
- A correctly sized solar system for a home typically covers up to 90% of a household’s monthly consumption
- The central government subsidy under PM Surya Ghar Muft Bijli Yojana brings the effective solar panel installation cost down substantially
- A tier-1 solar module still performs at roughly 80% efficiency after 25 years; this isn’t a five-year appliance, it’s a decades-long asset
- With net metering, surplus power you generate but don’t use gets credited against your bill instead of going to waste
Understanding Solar Panel Installation Cost in India
The number everyone actually wants first is the price tag. Solar panels for home cost varies by system size, panel technology, and your state’s subsidy structure. Here’s a realistic benchmark before you start collecting quotes. We have taken the example of Nagpur here:
| System Size | Approx. Cost (before subsidy)* | Central Subsidy (PM Surya Ghar) | Approx. Cost (after subsidy)* |
| 2 kW | ~₹ 1.73 lakh | ₹ 60,000 | ~₹ 1.13 lakh |
| 3 kW | ~₹ 2.17 lakh | ₹ 78,000 | ~₹ 1.39 lakh |
| 5 kW | ~₹ 3.33 lakh | ₹ 78,000 | ~₹ 2.55 lakh |
| 10 kW | ~₹ 6.05 lakh | ₹ 78,000 (capped) | ~₹ 5.27 lakh |
*DISCLAIMER: Prices are subject to change. The above-mentioned solar panel prices are indicative as of 01 September 2026 for the SolarSquare Blue 6ft variant. The final cost of solar panel installation depends on your city, DISCOM charges, product variant opted for, panel type, inverter type, mounting structure height, type of after-sales service, savings guarantee, roof height, etc.
What Affects Solar Power Installation Cost
No two rooftops price out the same. These are the variables that actually move the number on your quote:
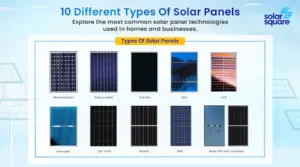
- Panel technology: Monocrystalline and TOPCon (Tunnel Oxide Passivated Contact) panels cost more upfront but offer higher efficiency per square foot than older polycrystalline panels. They’re a good option when roof space is limited.
- Inverter type: There are multiple types of solar inverters available in the market. String inverters are the standard, budget-friendly choice for most homes; microinverters cost more but perform better on roofs with partial shading.
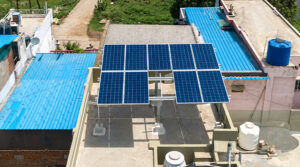
- Roof condition and structure: Mounting on RCC (Reinforced Cement Concrete) roofs is generally cheaper than tin/sheet roofs, which need custom mounting structures.
- Site shading and orientation: A south-facing, unshaded roof needs fewer panels than a partially shaded one to hit the same output.
- AMC (Annual Maintenance Contract): Most reputed solar power companies bundle a few years of free AMC into the installation cost,7 check what’s included before comparing quotes on price alone
How a Solar System Actually Powers Your Home
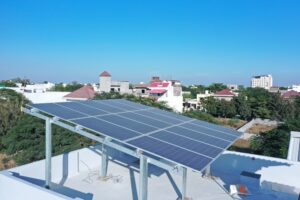
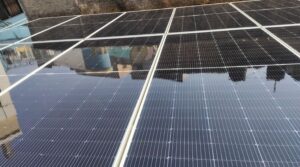
It helps to understand what you’re paying for. A rooftop solar system works in a simple sequence: sunlight hits the panels and is converted into DC (Direct Current) electricity through the photovoltaic effect. An inverter then converts that DC into AC (Alternating Current), the form of electricity your home appliances actually use. Your home draws on solar power first; any shortfall is pulled from the grid, and any surplus is exported to the grid through your net meter.
How to Install a Solar System: Step-by-Step Process
This is the part most guides skip: the actual sequence of events between deciding you want solar and switching it on. Here’s how home solar installation unfolds, step by step.
Step 1: Calculate Your Solar Setup for Home Requirements
Start with your average monthly electricity bill or unit consumption, visible on your electricity bill. A useful rule of thumb: every 1 kW of rooftop solar produces roughly 1,400 units a year in most parts of India. Divide your annual consumption by 1,400 to estimate the system size you’ll need; this is your starting point for every quote you collect afterward.
Step 2: Choose an MNRE-Empanelled Solar Company
This step is easy to skip and expensive to skip. Not every vendor is eligible for subsidy disbursement. Under the PM Surya Ghar Muft Bijli Yojana, you must install through a vendor empanelled with the Ministry of New and Renewable Energy (MNRE) and registered on your state DISCOM’s (Distribution Company) portal. Ask any solar power installation company for their empanelment ID before signing a contract; if they can’t produce one, the subsidy claim may get rejected or delayed regardless of how good the installation itself is.
Step 3: Site Survey and System Design
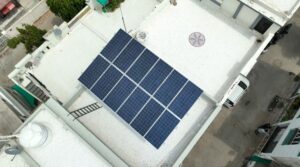
A qualified installer like SolarSquare visits your home to assess roof area, orientation, shading patterns across the day, and structural load. This determines the final panel count, inverter sizing, and mounting design; it’s also your chance to flag anything unusual about your roof (water tanks, overhead cables, upcoming construction) before the design is finalised.
Step 4: Apply on the National Portal (pmsuryaghar.gov.in)
If you want to claim the subsidy, registration on the national rooftop solar portal happens before installation begins, not after. You’ll need:
- Electricity bill or consumer number
- Proof of ownership or occupancy
- Bank account details linked to Aadhaar, for Direct Benefit Transfer
Step 5: Panel and Component Procurement
Ensure your panels are on the ALMM (Approved List of Models and Manufacturers); this is non-negotiable for subsidy eligibility. Non-ALMM panels are one of the most common reasons applications get rejected, often after the installation is already complete, which is the worst time to find out.
Step 6: Installation and Mounting
The physical solar power installation typically takes 1-3 days for a residential system. SolarSquare prides itself on installing its residential rooftop solar system within 8 hours, and it involves:
- Mounting structure installation on the roof
- Panel fixing and wiring
- Inverter installation
- Earthing and lightning protection setup
Step 7: DISCOM Inspection and Net Metering
Once installed, your DISCOM inspects the system and installs a bi-directional net meter, which separately records the electricity you draw from the grid and the electricity you export back to it. At billing time, the DISCOM nets the two figures against each other; if you exported more than you imported in a cycle, the surplus typically carries forward as a credit, subject to your state’s specific policy. This step is mandatory before the system can be switched on and before any subsidy is released, so it’s worth confirming your installer has a track record of getting net metering approvals through smoothly in your state.
Step 8: Commissioning and Subsidy Disbursement
After DISCOM approval, the system is commissioned, and the subsidy is transferred via DBT (Direct Benefit Transfer) to your linked bank account; typically within 30-45 days of a successful inspection, based on standard MNRE-empanelled installer timelines.
Solar Installation for Beginners: Common Mistakes to Avoid
Most delays and rejected subsidy claims trace back to a handful of avoidable errors. Knowing them in advance is the easiest way to skip them entirely.
- Skipping portal registration before installation: Subsidy claims filed after installation is complete are frequently rejected
- Choosing non-ALMM panels: To save cost upfront, which disqualifies the subsidy entirely
- Ignoring roof shading patterns: Across seasons, which quietly reduces real-world output well below the quoted estimate
- Undersizing the system: Based only on current bills, without factoring in future load like EV charging or an additional AC unit
- Using uncertified local technicians: Instead of DISCOM-registered, empanelled vendors, which risks both safety and subsidy eligibility
- Mismatched name or address details: Across the electricity bill, bank account, and portal application, a surprisingly common cause of processing delays
How to Choose the Right Solar Power Company
The installer you choose determines almost everything downstream: how fast your subsidy comes through, how well the system performs, and how easy maintenance is five years from now. When comparing solar power companies, look beyond the quoted price:
- MNRE empanelment and DISCOM registration status
- Warranty terms on panels (typically 25 years) and inverters (5-10 years)
- Whether maintenance service is included, and for how long
- A demonstrated track record with net metering approvals in your specific state
- Use of ALMM-listed, tier-1 panels rather than unbranded or unlisted equipment
This is where an established, end-to-end solar company like SolarSquare can save you time. Instead of managing the site survey, portal application, ALMM-compliant sourcing, and DISCOM coordination separately, one team handles the entire process. It helps keep your subsidy and net-metering approvals on track.
Rooftop Solar Myths That Still Hold Beginners Back
Even with the economics squarely in solar’s favour, a handful of persistent myths keep first-time buyers on the fence. Here’s what’s actually true.
- Solar doesn’t work during monsoon: Solar panels generate electricity from light, not heat, so while output does drop on heavily overcast days, it doesn’t stop. A well-designed system still delivers meaningful generation through the monsoon months, and annual output estimates already account for seasonal variation.
- Solar systems need frequent, expensive maintenance: Maintenance for a rooftop system is mostly periodic panel cleaning and occasional checks; it isn’t a recurring expense that eats into your savings. Most reputed installers, SolarSquare included, bundle an AMC (Annual Maintenance Contract) into the installation, covering routine upkeep for a set number of years at no extra cost.
- Solar panels reduce property value: The data points the other way; homes with an installed, functioning solar system typically command a premium over comparable homes without one, since a buyer is effectively inheriting years of reduced electricity bills along with the property.
- The system stops working after 25 years: A 25-year warranty is a performance guarantee, not an expiry date. It means the panel is certified to operate at a minimum efficiency threshold, typically around 80%, for that period, not that it switches off afterward. Most systems continue generating usable power well past the 25-year mark, just at a gradually reduced output.
Conclusion
Installing a solar system isn’t complicated once you see the whole sequence laid out: size your requirement, pick an MNRE-empanelled installer, register on the national portal before work begins, use ALMM-listed panels, and get your net metering sorted through your DISCOM. Every mistake covered in this guide happens when you skip a step or do them out of order.
The good news is you don’t have to manage all of it yourself. SolarSquare handles design, subsidy filing, installation, and DISCOM coordination as one connected process, rather than leaving you to chase approvals between separate vendors, is usually the difference between a system that’s live in six weeks and one that’s stuck in paperwork for six months.
Frequently Asked Questions
How much subsidy do I get under PM Surya Ghar?
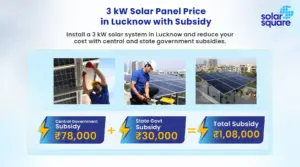
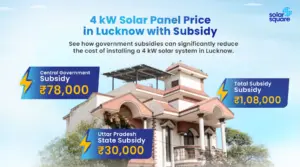
The scheme pays up to ₹ 78,000 in central subsidy for systems of 3 kW and above, specifically ₹ 30,000/kW for the first 2 kW and ₹18,000 for the third kW. Special category states (the North-East, Uttarakhand, Himachal Pradesh, Jammu & Kashmir, Ladakh, and the Andaman & Nicobar and Lakshadweep islands) receive a higher rate. Several states also offer additional top-up subsidies on top of this central amount.
Do I need government approval to install solar panels at home?
Yes, in two ways: net metering approval from your DISCOM is mandatory for any grid-connected system, and registration on the PM Surya Ghar national portal is required if you want to claim the central subsidy. Skipping either step is one of the most common causes of delayed or rejected installations.
What is ALMM, and why does it matter for my installation?
ALMM (Approved List of Models and Manufacturers) is the government-maintained list of certified solar panel and cell manufacturers whose products qualify for subsidy support. Installing panels that aren’t on this list is one of the most common reasons subsidy applications get rejected, so it’s worth confirming ALMM compliance in writing before your installer procures equipment.
Can I install a solar system on my own without a professional?
It isn’t advisable for a grid-connected system. Beyond the technical wiring work, net metering approval and subsidy eligibility both require installation through an MNRE-empanelled, DISCOM-registered vendor; a self-installed system, even a technically sound one, generally can’t be commissioned or subsidised through official channels.
How long do solar panels actually last, and does output degrade over time?
Tier-1 solar panels typically carry a 25-year performance warranty and continue operating at around 80% of their original efficiency at the end of that period. Output does degrade gradually year over year, usually around 0.5% annually, but panels remain functional and continue generating meaningful power well beyond the warranty period.


 Previous Article
 20 min